OST is a file format of MS Outlook that saves databases of Exchange Server locally. OST stands for Offline Storage Table. OST file format lets you work offline with Exchange Server. It synchronizes with Exchange Server when connection is established.
Reasons for Renaming OST file in Outlook
Users can fix issues with MS Outlook by recreating or renaming/change OST File Name. Sometimes, OST files are inaccessible because of some issues. It can be fixed with recreation of OST files.
- When MS Outlook shows disconnection
- When Outlook seems freeze or not working
- Sending and receiving issue with emails because of poor size of mailbox
- Outlook calendar fails to display information such as Free or Busy information
- Corrupted OST files
Renaming of OST file is an effective way to make inaccessible OST files you notice any of these problems on your MS Outlook.
Ways to Change OST File Name
Here are the steps you can follow to recreate and rename an OST file.
- Get out from MS Outlook
- Hit the Start tab and then access the Control Panel
- Select the Mail tool. A new window will open, click on the Show Profiles
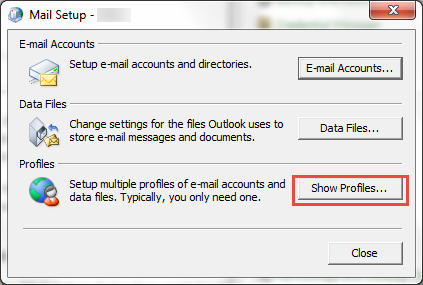
- In Mail window, choose the Profile name and then press Properties
- Press the Email Accounts option
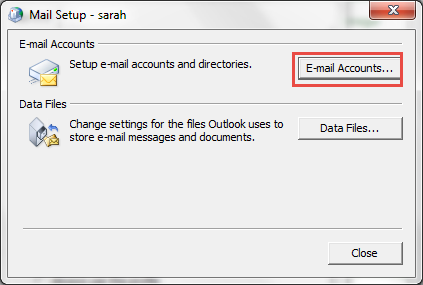
- Select the existing Exchange account and then press the Change tab
Enter the Server IP address and the Profile ID. Then, click on the More Settings
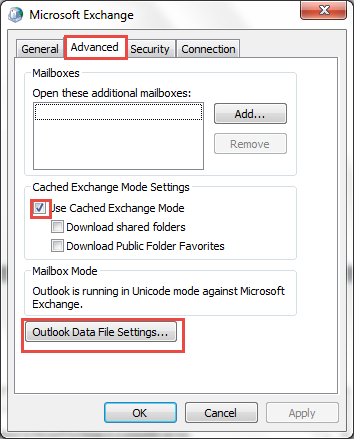
- Now, in the Advance section, check the Cached Exchange Mode option
- Press the Outlook data file settings
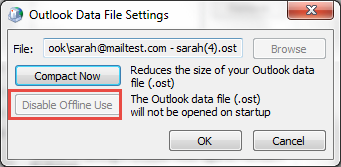
- After that, press the Disable Offline use. A new dialogue box open, press Yes here. It you notice the Disable Offline Use option is not active, it indicates “Use Cached Exchange Mode” is not check. The previous steps were not cleared.
- Press the Offline Folder File option and then press OK.
- After this, check the “Cached Exchange Mode” in Cached Exchange Mode Settings.
- Now, press the OK tab, hit Next and then the Finish tab.
- After this, press the “Close in Account Settings” and then the Mail Setup dialog box.
If the above method fails to work, you can rebuild the OST file.
Rebuilding of OST Files in Outlook 2013 & 2010
If you want to rebuild an OST file, you have to first delete the existing OST file.
Steps to Delete the Existing Current OST Files
Here are the steps to delete existing current OST files.
- First, turn down MS Outlook
- Navigate the Default location of OST files. Here is the path for the default location of MS Outlook 2013 or 2010 versions:
C:\Users\Computer Login ID \AppData\Local\Microsoft\Outlook.
- It will display the listed OST files.
- Right click the target OST file and then click on the Delete button.
Recreate and Rename OST file Outlook 2013 and 2010
Here are the ways to recreate and rename or Change OST File Name.
- Go to the Control Panel and then the Mail option from the list
- Mail window will open, press the Show Profiles tab here and then the Add tab
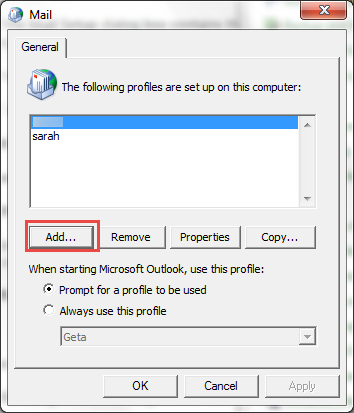
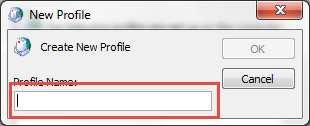
- Provide a new profile name and then OK.
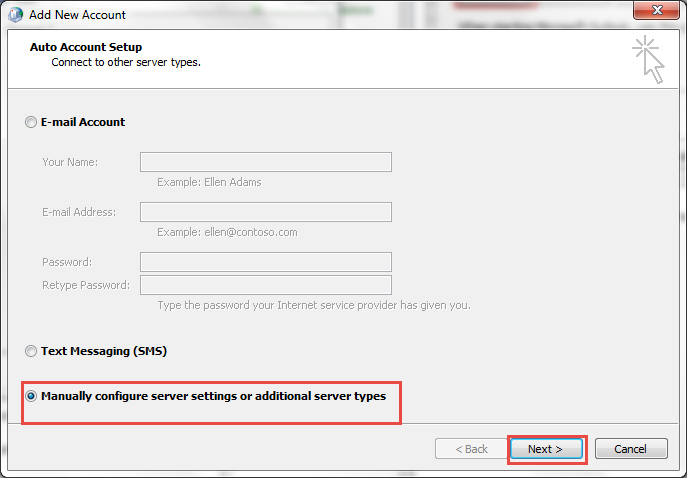
- Now, check the radio button of the manually configure server Settings or additional server types statement and press Next.
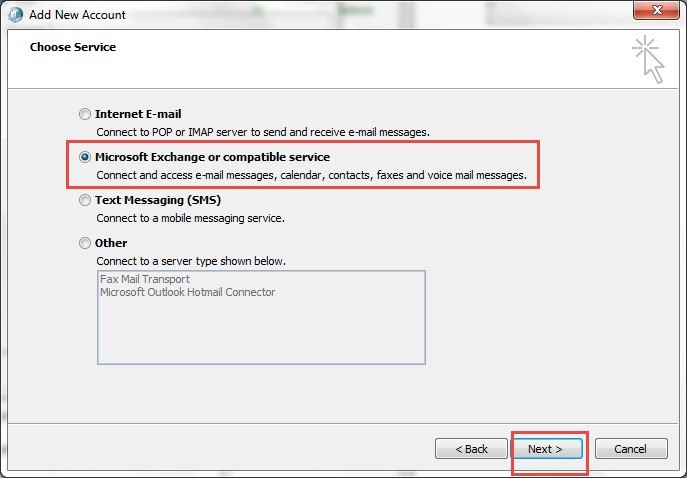
- Then, select the radio button of Microsoft Exchange or compatible service and then the Next button.
- Enter the IP address in the Server Settings option and then the user name. Then, check the Use Cached Exchange Mode.
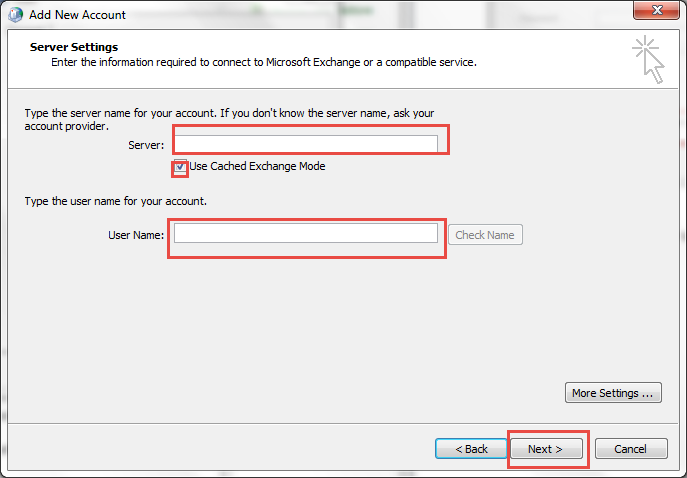
- Finally, press the Finish tab.
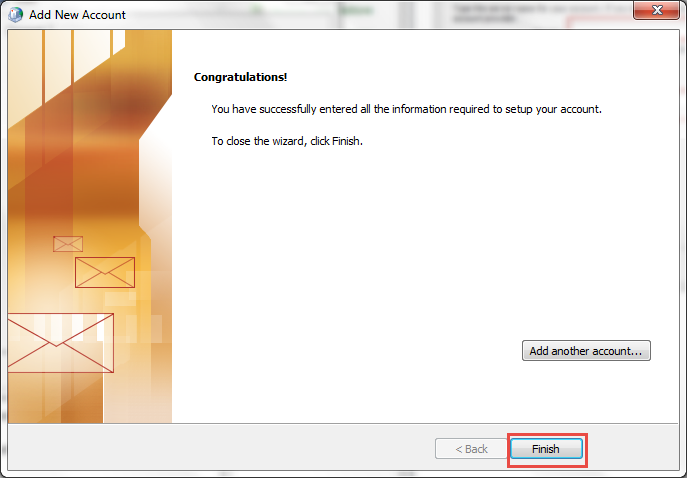
Now, you are ready to open the new account in MS Outlook
Conclusion
For the recovery of OST files, you have some other options. TrustVare OST Recovery is one of the best tools. It recovers and exports OST files to PST file format with losing properties.

