All MS Outlook for Windows users are familiar that MS Outlook supports two types of email file extensions. One is OST (Offline Storage Table) and the other is PST (Personal Storage Table). PST is the default file format of MS Outlook and it is preferred to OST because of its compatibility and durability.
When a MS Exchange Server or IMAP account configure with MS Outlook, formation of OST file takes place. In other words, Outlook saves its data in OST file format. OST file format is more vulnerable than PST. Such a file is device specific. If you change your system or the Exchange account is inaccessible, the OST file becomes inaccessible. Therefore, the best practice is to create backup of OST in Personal storage table. The article highlights the best possible ways to move Offline OST files to Personal storage table file format in Microsoft Outlook 2019, 2016, 2013, 2010, 2013, 2010, 2007, and 2003 versions.
Reasons for Backup OST File
There are numerous reasons why users like to move OST files to MS Outlook. The most common reason is here.
OST Synchronization Issue: OST files are accessible in offline mode. When Outlook synchronizes with the Exchange Server, it is difficult to work with the file. Therefore, backup of OST files is the need of the hour.
Authentication Issue: If your Exchange Server is crashed or the Exchange account is not accessible, the OST file associated with the Exchange account will become inaccessible. At that time, you need archiving of the OST file.
Recovery of OST Data: If an OST file is enlarged than its capacity, it can corrupt anytime. If the Exchange account is accessible, the associated OST file will become inaccessible. At that time, backup of the OST file is the only solution.
Damaged OST Files: Virus attacks, abrupt shutdown, and other software-related issues can make OST files inaccessible. Therefore, you cannot entirely depend on OST files to keep your important contacts and emails.
Manual Methods to Backup OST File
Solution 1- Taking Help of Export Solution
Users can apply the backup method to all versions of MS Outlook. Here are the steps to follow-
Step-1 Download and activate Outlook application on your system.
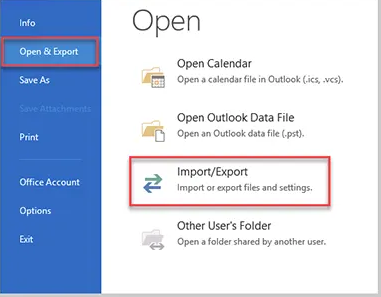
Step-2 Navigate the File menu and select the “Export to a file” option and then the Next tab
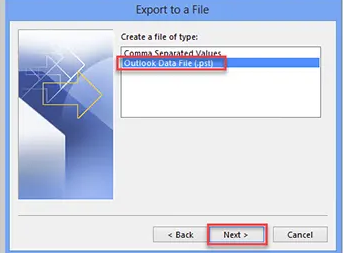
Step-3 In the Export to a file box, select Personal File Folder (.pst) and press Next
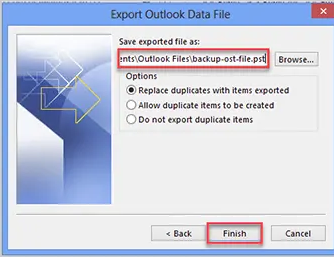
Step-4 Now, select the desired folder for backup and check the checkbox stating Include Sub-Folders
Step-5 Now, direct the tool for output location.
Step-6 Press the Finish button to complete the process.
Note: The above method is excellent to apply if you are using Microsoft Exchange Server.
Solution 2: Archiving Data
In this method, users create a backup of OST files. It has varied steps to follow. Here are the steps to apply to archive OST file (for the IMAP account) or backup Exchange OST File:
Step-1 Access MS Outlook on your system.
Step-2 Now, click on the File menu, and choose the Archive option here.
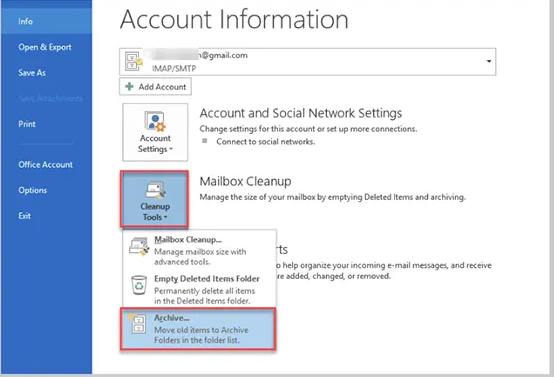
Step-3 A new box will open, select the required file or folder for archiving.
Step-4 Now, locate the location to save OST data into PST file format.

Step-5 After that, press the OK button to begin the archiving process.
Note: The above manual process proceeds successful conversion of OST files or backup of OST files.
Solution 3: Creating a New PST File
In this step, an OST file is archived in PST file without losing quality. Here you create a new PST file.
- Access MS Outlook app on your system.
- Then, Generate a new Outlook PST file.
- Drag and drop the entire mailbox data to PST.
Automated Conversion OST to Outlook
If you have multiple export OST files and want to reduce the data loss process, conversion of OST to Outlook is the best practice. Automated conversion has magic. It allows conversion of single or multiple OST files into Outlook. For migration, your basic computer skills are enough. Conversion and repairing of OST files take place at the same time. TrustVare OST Backup Tool is one of the best tools to export OST to Outlook after recovery. Here are the steps to follow to run the program.
Step To Export OST files to Outlook
- Download and install the application on your system.
- Now, select the “File Mode” or “Folder Mode” to filter locally saved OST files.
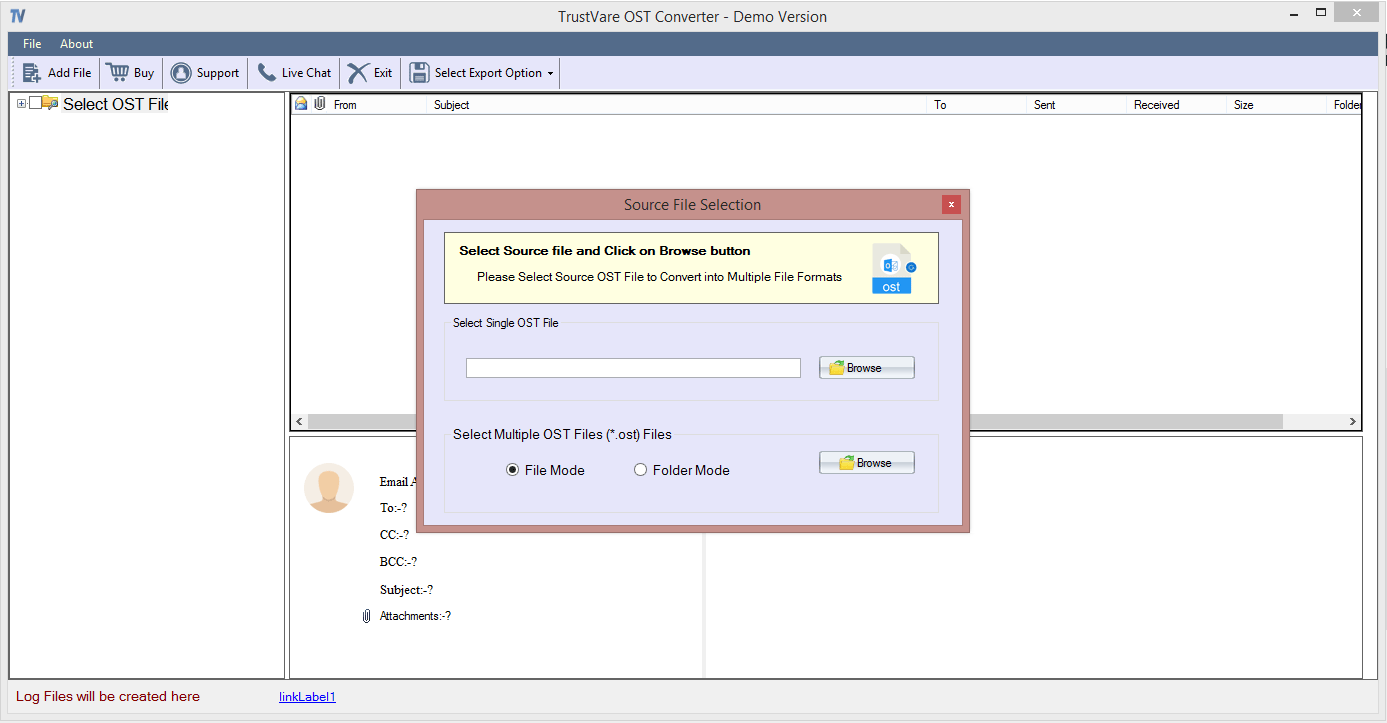
- Press the “Browse” tab to locate and upload the target OST files.
- Now, get the preview of the uploaded OST files and filter to export only necessary database.
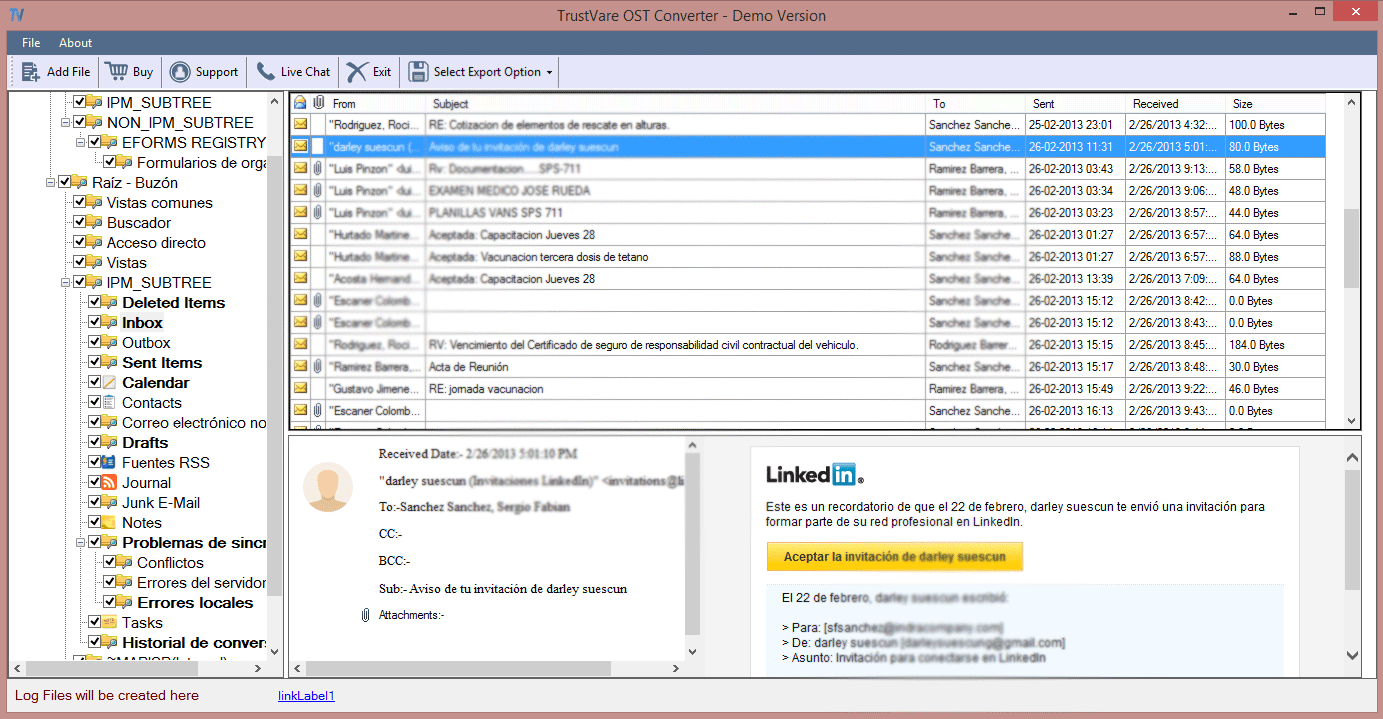
- After that, choose the option “Export to PST” and click on the “Browse” button to direct the location of the output.
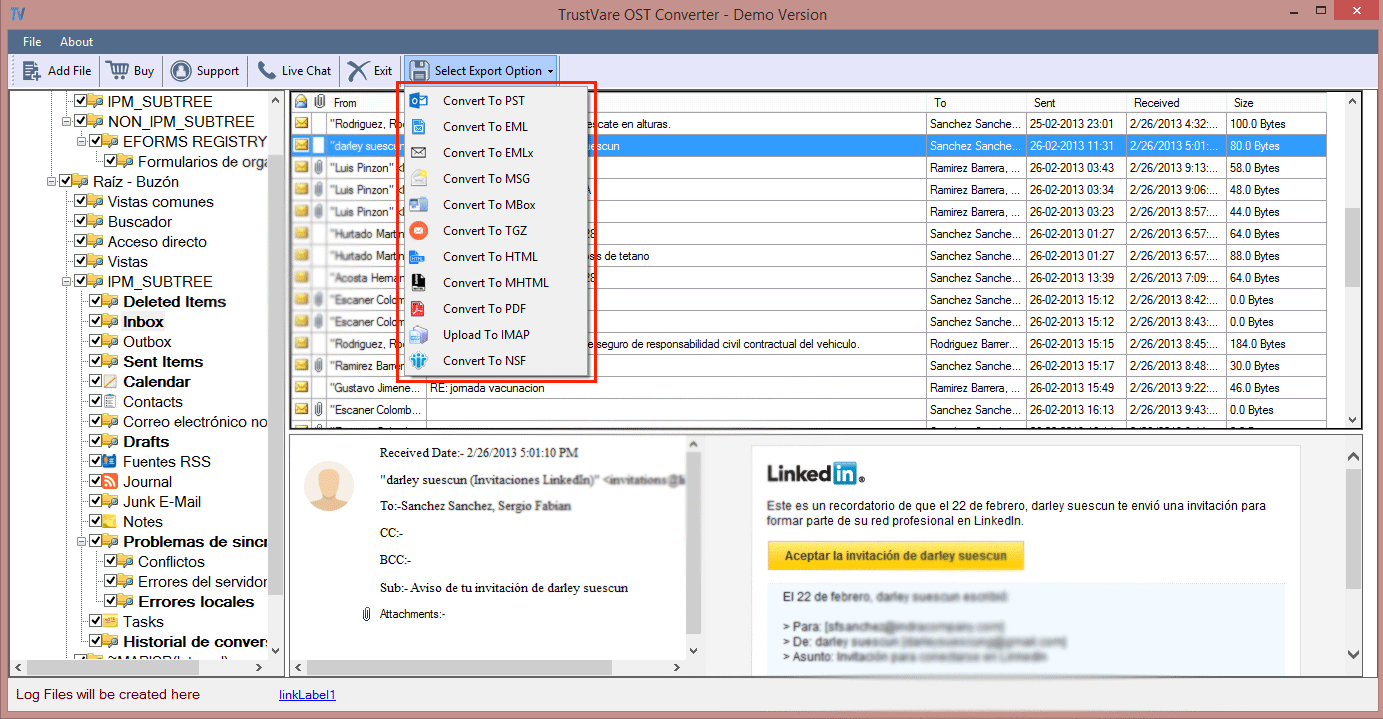
- Now, press the “Convert Now” button to complete the process.
Note: The automated conversion program doesn’t need installation of MS Outlook to backup OST data in PST. It is an advanced application.
Conclusion
The above procedures help to backup OST files from Outlook 2019, 2016, 2013, 2010, 2007, and 2003 versions. Manual methods are recommended to users who have technical skills and want to backup only limited OST files. For backup of large number of OST files, an automated tool is the best alternative. It reduces the pressure of backup and increases the backup chance without losing properties.

