When it comes to one of the best desktop-based email clients for Windows, there is no comparison of MS Outlook with other platforms. MS Outlook gives users an excellent platform to manage emails, contacts, notes, journals, and events. With MS Outlook, users stay alert for their upcoming events and share work in the office under the MS Outlook environment that is safe to use.
G Suite is an upgraded version of Gmail. It is an excellent content management system on the cloud. G Suite and MS Outlook are subscription-based email clients. G Suite is so popular among small to large organizations to operate emails on the cloud.
Why does User Like to Convert OST Files to G Suite?
Both platforms add value to the workspace by increasing productivity. It is difficult to determine which one is better and why. Here are some common reasons why users like to export OST file data to G Suite.
OST stands for Offline Storage Table which allows users to store up to 50 GB of data in one file. If you extend the limit, the file can crash and becomes inaccessible. If you have some important emails and you are looking to compress the file size of OST, it is a good idea to export them to G Suite. Your emails are safe in G Suite.
Large OST files influence the performance of MS Outlook by making it slow. It is annoying when your Outlook becomes slow because of the heavy file size. In this situation, conversion of OST emails to G Suite is beneficial. The file size reduces without much effort.
OST files are device-specific. For instance, if you have created an MS Outlook account in a system, only in that system you can access its OST files. Hence, data sharing from one system to another is difficult. But the conversion of MS Outlook data to G Suite can fix the problem. G Suite is not device-specific. You can open a G Suite account on any device including handheld smartphones.
OST files are prone to corruption. Exchange Server failure can make OST files inaccessible. Hence, your important emails will become inaccessible. With G Suite, there is no problem of being inaccessible until you have the active subscription plan.
Conversion Methods to Export OST Databases Successfully to G Suite
When we talk about conversion options, users have two choices to consider. One is manual conversion and the other is an automated tool. There are a few handfuls of manual conversion solutions but seem not so effective because they consume time and need good technical understanding.
Manual Conversion Solution
There is no direct solution to export OST files to G Suite. You need to export OST to PST and then PST to G Suite.
Step 1- Conversion of OST to PST
Open your MS Outlook account, go to the File, then Account Settings, Again Account Settings
From the Account Settings wizard, click on the Data Files option, select the OST file of your choice and press the “Open File Location” button
Once you locate an OST file, go to the “File” tab and then “Open & Export” then Import/Export. It will open a new wizard, select the “Export to File” option and press the Next tab.
It will open the Export to a File dialogue box, choose the “Outlook Data File (.PST)” option, and then the Next tab.
Now, click on the email account and choose the folder you like to export to PST.
Press the Finish tab.
Step 2- Use the G Suite Migration for Outlook (GSMMO) tool
G Suite Migration for Microsoft Outlook (GSMMO) is a desktop-based tool that allows users to export PST files to G Suite.
1. Download and launch the application.
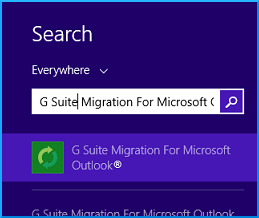
2. To provide your credentials, press the Continue to proceed
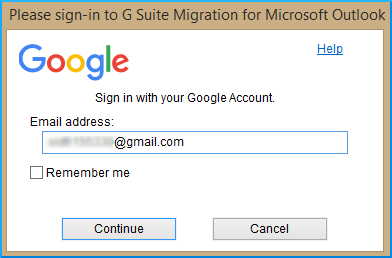
3. It will open the Sign-in page automatically in your default browser.
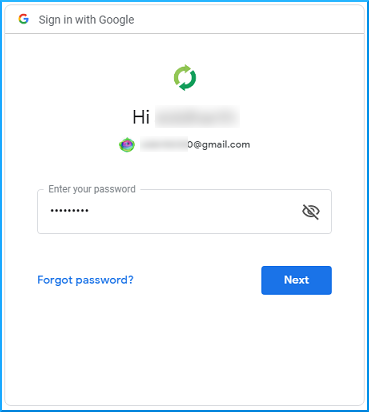
4. A message appears where the GSMMOwants to access your Gmail account. Press the “Allow” tab.
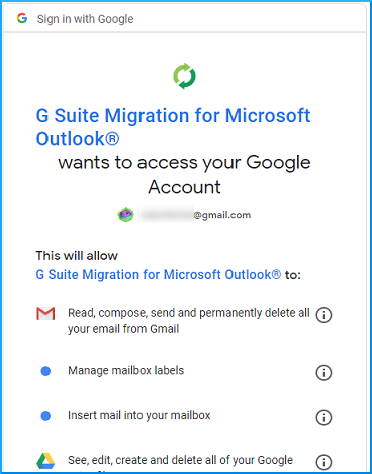
5. If you meet the process successfully, you will get the below message.

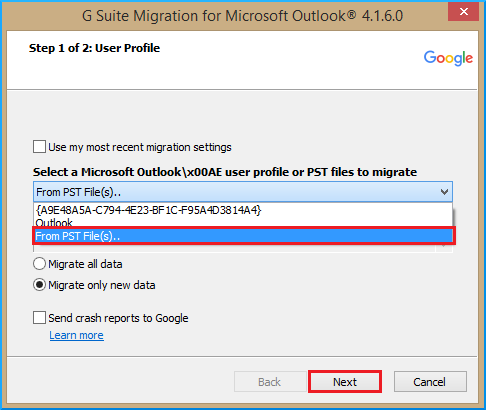
6. A new window will open, from the drop-down, select From the PST file(s)option and then press the Next button.
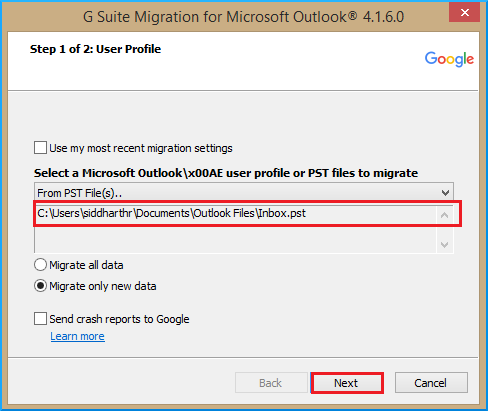
7. It will take you to the location where PST files are stored. If the location is different, you can direct the tool by providing the correct path.
8. The file is importing, press the Next tab
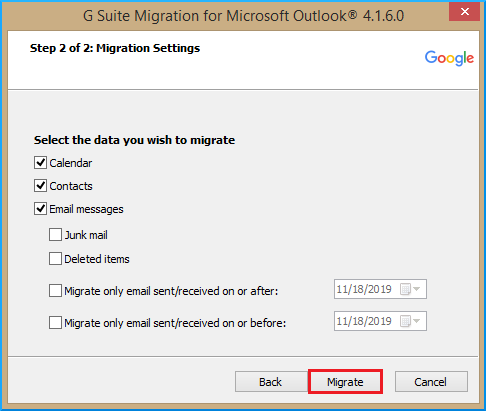
9. Select the data you wish to migrate and then press the Migrate tab.
10. The process of migration will start. Your selected data will migrate. It is difficult to tell the duration it will take as it depends on the file size.
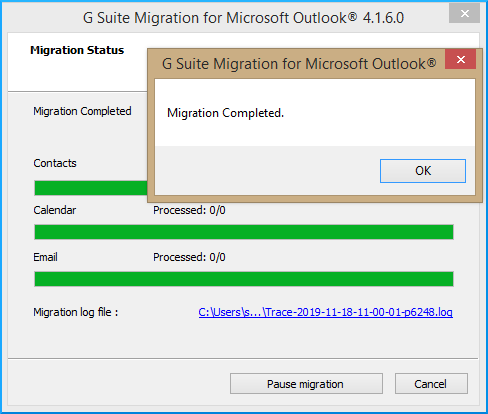
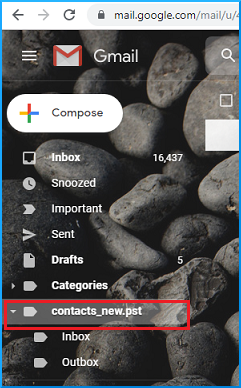
11. As the process will over, a small window pops up to tell you about the completion of the step. Now, log in to your account and see the file in the left pane.
Automated Conversion
How do you find the manual conversion process? Is it so lengthy? It will consume time and suck your brain if you are not so technically sharp. Therefore, the best solution is to use a conversion program like Trustvare OST to G Suite Converter. It is a straightforward application to simplify your conversion goal.
Below are some key features of the application-
- It doesn’t need technical competency to operate conversion.
- It simplifies the goal of conversion by making it short and easy to follow.
- No additional tool is required to transfer data as the tool is independent.
- Conversion results are always accurate. The tool keeps the file quality intact.
- The license of the application is valid for an unlimited duration.
- The utility is valuable to use by personal and commercial users.
Conclusion
So, what is your plan for conversion? Do you want to go for manual methods or want to use a third-party application? Companies can use a third-party program to transfer data without losing data integrity.

