Offices where MS Outlook is used for day to day email communication and data management, they want to make MS Outlook as their default email client. In this article, we get the solutions to set Outlook as the default email client and the problems faced by users to set Outlook as the default email client.
There are usually two different ways to set outlook as the default mail client – Change the Windows settings or change the Outlook settings. Here are the methods to apply.
Method 1: Change Windows Setting to Set Outlook as the Default Email Client
In Windows 10:
- Browse the Windows Taskbarand then the Start tab.
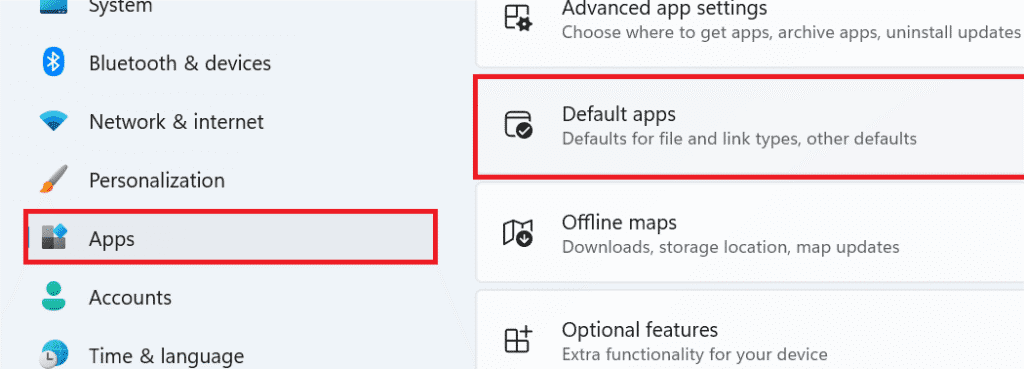
- Choose Settings> Apps > Default Apps

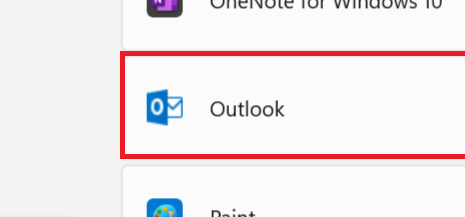
- Click on Outlook

- Now, switch off the Windows Settings dialog box to complete the process.
In Windows 8:
Here we take help from the Control Panel.
- Click on the Windows Key + R tab. In the Run box type Control Panel and then press the OK tab.
- Now, you are in the Control Panel window. Click here Control Panel Items and then Default Programs
- It will open a new dialogue box, click on Associate a file type or protocol with a program
- Next, a long list will appear, scroll down to locate MAILTO. Double-and press MAILTO.
- A new screen will feature with the following question- How do you want to open this type of link (mailto)?
- Choose Outlook in the given list.
- Apply the changes and then shut down the window
In Windows 7:
Here there are a few alternations in the method.
- Press the Startbutton to select Control Panel
- After this, press the Default Programsand then Set Default Programs
- From the left list, select Outlook. ( Outlook Express, Microsoft Office Outlook, or the version you have installed)
- After that, press the Set this program as default option
- Finally, press OK to wrap up the process.
Quick Tip: Remember, it is common to lose the previous account when you change Outlook settings or upload Outlook in the new system. You can avoid this by using a backup tool like OST to PST Converter or PST Converter to export data to a desirable file format like PDF, MSG, EML or MBOX.
Method 2: Change Outlook Settings to make Outlook your default email
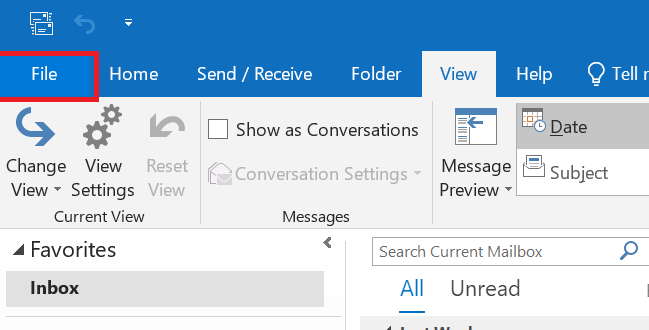
- For this, download and run the app and move the cursor on the File option

- From the dropdown, select Options and then General Tab. For Outlook 2017 users, navigate the Tools menu and then press the Options tab
- Check the box with this dialogue- Make Outlook the default program for E-mail, Contacts, and Calendar featuring in the Start-up Options.
- After that, press the OK tab. For Outlook 2010, the General Tab is not available. You will notice the Start-up Options as you access the Options window.
The following steps can make Outlook your default email client as you open the system.
“Outlook is not recognized as Default Email Client” Error
There are situations when you try to send emails and the system denies identifying Outlook as the default email client. It is a common issue faced by all Microsoft Outlook versions including Outlook 2010, Outlook 2013, Outlook 2016 and 2019.

To fix the problem, the foremost step is to confirm whether Outlook is setup as a default email client or not. If Outlook is not setup as a default email client, you can follow the above given method. If you see that MS Outlook is already set as the default application for emails, there may be problems with Outlook.
Reasons for Outlook Not Recognizing as a Default Email Client
- There are chances that you are using Outlook of 64-bit and the rest Office applications are 32-bit. This could lead the situation.
Resolution: If you are using the latest Office 2019, your Outlook will be of 64-bit. If you are using Office 2016 or an earlier version, Outlook will be of 32-bit version. It is prohibited to not to use a 64-bit Office until you manage large data files of around 2GB or more. Therefore, take your time to check the configuration of Outlook application. It is good to reinstall the correct version so that configuration takes place successfully.
- Another reason could be that you have installed Outlook after installing Office.
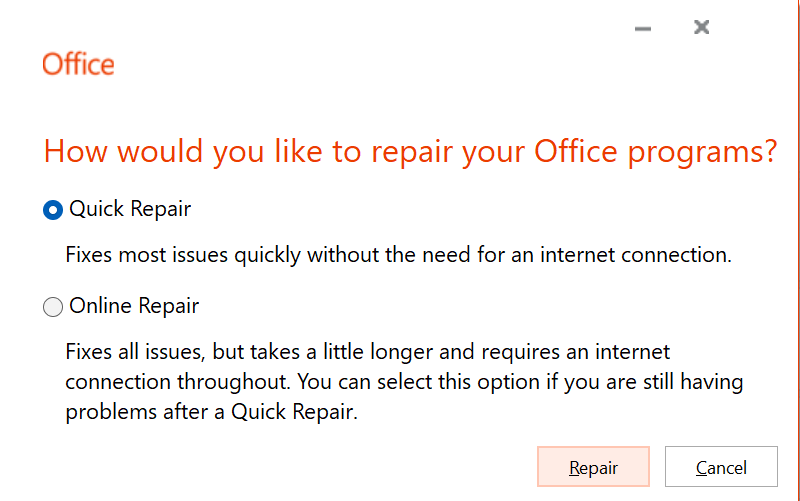
Resolution: Repairing MS Office with the following steps.
Browse the Windows Settings.
Press Apps and then navigate the Installed Apps.
Click on the 3 dots next to Microsoft Office 19 and choose Modify.

- click on Quick Repair.
- As the repairing task is over, reboot your system and access Outlook.

The above methods can help you fix the default Outlook setup issues. Sometimes, it fails because of PST or OST file corruption issue.
In this situation, you can use a third party application to repair inaccessible PST files. A PST or OST Repair tool helps to access damaged or corrupted PST files with all their properties.

